Showing posts with label Elegant Edges. Show all posts

Friday, February 10, 2012

Valentine Hearts Treat Boxes

My son's first preschool Valentine's Day party was today, and it was so cute!  I'd intended to make two treat bags for his teachers, but couldn't find my cello bags anywhere.  But sometimes misplaced craft supplies lead to something even better -- a reason to make my first 2-5-7-10 box!  Check out this tutorial from Split Coast Stampers.


 Project Details:
  • Box Base - 2-5-7-10 Box
  • Papers - Recollections
  • Cricut Cuts - heart from Doodlecharms, page 26; heart border from Elegant Edges, page 26; tag from Lovely Floral
  • Embossing - heart with Cuttlebug's Arygle
  • Other - ribbon from stash; brad and flower petals by Recollections; inking with black Stampabilities ink pad

I filled each treat box with Hershey's chocolate hearts.  And I think both my son's teachers liked their gift, because here's their reactions:


 HUGS!

I'm entering this project into the following challenge(s):

BBTB2: Challenge - Sweethearts Tags
Cooking with Cricut: Challenge #72 - Grown-Up Valentine
Scrappy Moms Stamps: Challenge - Hearts Galore

Tuesday, January 24, 2012

Cards for Kids Valentine's Blog Hop - Dump Truck Valentine

Welcome to the Cards for Kids Valentine's Day Blog Hop!  If you have come from Charlotte's blog, A Little Bit of Detail, you're in the right place. If you're just joining us, please go to Faith Abigail Designs and start at the beginning.

Valentine's Day is the perfect time to show someone how much you love them. So this year, let's send a little love to those that need it most!  Each of us has created a Valentine's Day card for a sick child, and we're asking you to do the same.  Simply create a Valentine's Day card, link it to Faith Abigail's blog entry by February 7, and mail it to:

Faith Abigail 
10621 Fuller Ridge Circle
Charlotte, NC 28270


On February 10, Faith will collect and donate all the cards to a children's hospital in her area. Please include a small message inside your card; envelopes are not necessary.

Now, what would a blog hop be without prizes? We have some amazing prizes donated by some very talented and generous women and lots of ways to win!  You can see all of the amazing prizes at the blog hop starting page at Faith Abigail Designs.

So, onto my project...!

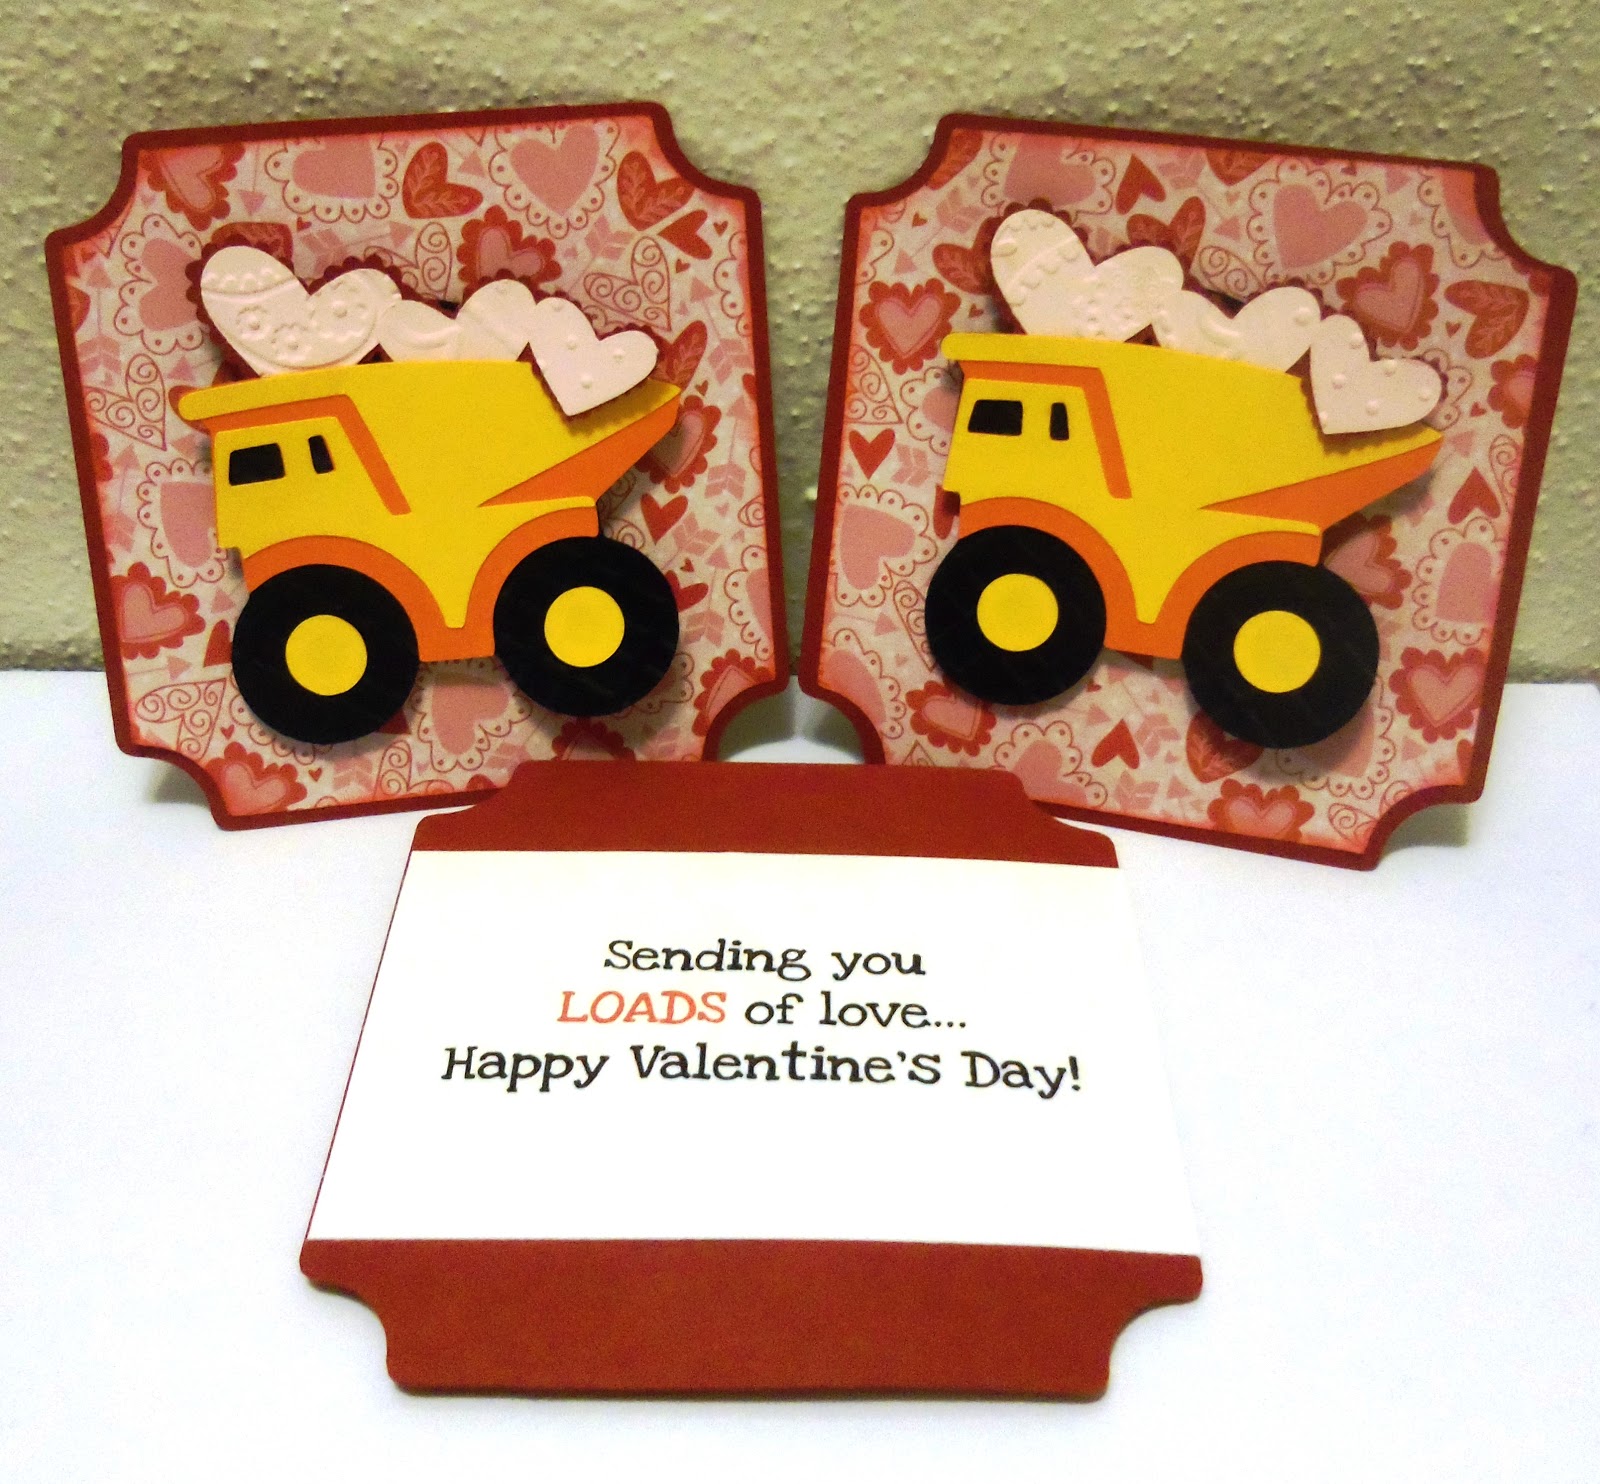
I was inspired to make a Valentine's Day card perfect for any little boy.  My three year-old son is currently obsessed with construction equipment, so I made the dump truck the star of this valentine:


 Card Details:
  • Card Base - "branch-s" from Elegant Edges, page 38 @ 3.75 inches, including Shadow layer
  • Papers - pattern from Recollections - All Seasons; cardstock by Recollections
  • Cricut Cuts - dump truck from B Is for Boy; hearts from Doodlecharms, page 26
  • Embossing - hearts with Cuttlebug's Perfectly Paisley and Swiss Dots and The Paper Studio's Doodle Borders
  • Other - inking with red Colorbox ink pad; sentiment printed with my computer, dump truck on pop dot

I'm sending a few of these to Faith Abigail for the children's hospital, and then I'm making 20 more for my son's preschool Valentine's party.  (It's his first class party -- I'm so excited and probably going overboard with handmade cards.  But he's too young to get embarrassed, right?) 
 
I'd also like to offer a little prize in honor of this fabulously fun Valentine's Day blog hop.  One lucky commenter to my blog post will receive a selection of Valentines ribbon (pictured to the right) to make your own card!  Each ribbon design is about 18 inches in length, for a total of 3 yards of heart-throbbin' V-Day embellishment.
 
To be sure you can use your ribbon before February 14, I'll draw a winner with random.org this Friday, January 27, at or round 7am CST.  To enter, just leave a comment below and tell me your favorite Valentine's candy.  YUM!  (Please note: I can only mail to US addresses.)


Thank you for checking out my Cards for Kids Valentine's Day card! Please continue along to the next blog and check out all of the wonderful projects that our designers have created!

Blog Hop Order:
Jessica @ http://cricutafterdark.blogspot.com/  <-- YOU ARE HERE
Suzanne @ http://cricutcraftingrammy.blogspot.com/


I'm also entering this card in the following challenge(s):

My Craft Spot - Challenge #42 - Let's Hear It for the Boys

Tuesday, November 29, 2011

Table Grace 2011 - Peacock-Themed Table Decorations

Hi friends!  I'm so excited to share a big project with you that occupied most of my November craft time -- an entire peacock-themed table!

Each year, my church's womens ministry hosts an event called Table Grace.  Ladies decorate 70+ tables in any theme -- the bigger and more elaborate, the better! -- and invite neighbors, coworkers, and friends to the event for a catered meal and inspirational speaker.  It's a great outreach event and accessible way to invite others to church who might not necessarily be open to coming to a Sunday worship service.

My friend Monica and I did a table together.  She's been wanting to redecorate with peacocks, so we took the opportunity to get a few key items for her new decor.  Our inspiration piece was her peacock feather runner and some gorgeous turquoise peacock ribbon we found in Hobby Lobby's Christmas section.  We set the table together, and I got to make some super awesome paper items with my Cricut!

Here's a photo of the entire table:


And some close-up shots of the centerpiece, place settings, and my Cricut creations:


Place Card Details:
  • Paper - patterned paper from Recollections: Charming; cardstock and glitter specialty paper by Recollections
  • Cricut Cuts - feather from Sentimentals, page 57 (many thanks to Glenda from Glenda's Cards for loaning me this cartridge!)
  • Other - names printed in FineSerif font from MS Publisher; glitter paint applied to outer feather cut; gem from Michaels $1 bin; inking with cyan Colorbox ink pad
Chair Tie Details:
  • Paper - patterned paper from Recollections: Charming; cardstock and glitter specialty paper by Recollections
  • Cricut Cuts - background with Elegant Edges, page 51; peacock from Give a Hoot, page 37 (and more thanks to my mom for loaning this cartridge to me!)
  • Embossing - peacock feathers with Cuttlebug's D'vine Swirls
  • Other - gems from Michaels $1 bin; inking with cyan Colorbox ink pad; peacock on pop dot

I hope you enjoyed our peacock table -- it was a hit with the ladies at our table and all those who viewed the tables before the event.

I'm entering this project into the follow challenges:

Decorate to Celebrate: Challenge #12 - Surprise, It's a Birthday - The event wasn't a birthday party, but we did have a birthday gal at our table!  And these items could easily be transferred to a fabulous adult birthday party.
The Paper Variety: Inspiration Challenge - I was inspired by the teal color and leaves that actually looked like feathers to me.

Friday, October 21, 2011

Icky, Spooky, Creepy Halloween Wall Decor

Halloween is so much more fun as a parent -- I think that's why I've been really excited about decorating for the holiday this year.  My little guy is totally into spotting pumpkin and ghost decorations in neighbors' yards, so I decided to make a wall hanging to put on our front door:


 Here's some close-ups of each panel:

Project Details:
  • Papers - patterned paper from ATD - Spookytown Collection; cardstocks by Recollections
  • Cricut Cuts - background panels from Elegant Edges, page 25; all other cuts from Mini Monsters - spider, page 54; ghost, page 42; pumpkin, page 61; spider web, page 74; trees, page 73; fence, page 72; "icky", page 28; "spooky", page 42; "creepy", page 31
  • Embossing - pumpkin with Cuttlebug's Distressed Stripes; spider belly with Cuttlebug's Spots & Dots; spider's bow with The Paper Studio's Doodle Borders
  • Other - pre-made glitter bow by Momentum; inking with black Stampabilities ink pad, green and purple Colorbox ink pads, and ultramarine and butterscotch Le Plume II markers; buttons and petal embellishments by Recollections; googly eyes from Target $1 Spot; spider, spider's bow, ghost, and pumpkin on pop-dots
I hung the project on little man's bedroom door to get a good photo with a solid white background -- and now he thinks it belongs there!  I'll have to sneak it to the front door when he goes down for a nap.

I hope you like my project.  It's definitely the most ambitious Cricut adventure I've had since my retreat last month.  And now I'm in the Halloween spirit!

I'm entering this project in the following challenges:

BBTB2:  Crafty Sprouts Contest - Halloween Project with Purple
Cooking with Cricut:  Challenge #56 - Purple and Green
Cricut 360º:  Spooky Halloween Blog Hop & Challenge
Decorate to Celebrate:  Challenge #11 - Halloween Party
My Sheri Crafts:  Challenge #71 - It's the Great Pumpkin!
Paper Playtime:  Challenge #58 - Say It with Sentiments - Use Buttons and Bows

Monday, October 3, 2011

Fantabulous Cricut: Challenge Me Monday #80 - Pumpkin Time

I'm finally recovering from a flu bug -- or something miserably enough like it -- long enough to show you one of the projects I did on my scrapbooking getaway at Rivendell Ranch.  This two-page layout is also my project for Fantabulous Cricut's Challenge Me Monday #80 - Pumpkin Time.

This time of year, pumpkins make me think...Halloween!  These scrapbook pages feature my son trick-or-treating last October:


Here's a few close-ups of my favorite Cricut cuts on the pages:

Project Details:
  • Papers - patterned papers by ATD - Spookytown Collection; cardstocks by Recollections and The Paper Studio
  • Cricut Cuts - pumpkin from Simply Charmed, page 60; bat from Simply Charmed, page 59; candy from Doodlecharms, page 63; spider from Doodlecharms, page 62; background shield from Elegant Edges, page 25
  • Other - inking with Colorbox purple, lime, and orange ink pads; "trick or treat" sticker and "candy please" tag from ATD - Spookytown Collection; Cricut cuts elevated on pop dots

I've been holding onto these ATD Spookytown papers for almost six months -- and I love, love, love them!  They are just perfect for a toddler/kid Halloween layout and match so well with the Simply Charmed cartridge's styling.  I'm really pleased with how these pages turned out, and I hope they'll inspired you to have some "pumpkin time" too!

Remember to check out the other pumpkin creations over at FCCB.  My fellow design team gals have some AMAZING projects this week.  I can't wait to see what you create!

I'm also entering this project in the following challenge:

Paper Playtime: Challenge #57 - Black, Orange, & Purple

Saturday, September 17, 2011

Two Baby Shower Cards

Hi, crafty friends -- I miss you!

I've been swamped since mid-August with substitute teaching at my son's preschool, three baby showers, and preparing for our first MOPS meeting of the year.  I'm finally seeing light at the end of this busy tunnel -- and it's a craft light!  Hubby is treating me to a scrapbooking retreat next weekend at Rivendell Ranch.  If I can just make it through the next five days of craziness, I get to relax with my Cricut, Cuttlebug, and absolutely no responsibilities.

I have made a few projects over the past few weeks, one of which you'll be seeing as a guest spot on Decorate to Celebrate while I'm away in crafting paradise.  But for now, I can show you two cards I made to accompany baby shower gifts:


Card Details:
  • Card Base - two <onesie> cuts from Wrap It Up, cut at 6.5 inches, adhered together above sleeves
  • Papers - cardstock by Bazzil Basics
  • Cricut Cuts - onesie from Wrap It Up, page 53; "P" from Birthday Bash (font and font shadow)
  • Embossing - "P" with Cuttlebug Swiss Dots
  • Other - brads by 7 Gypsies - Angelo; "P" on pop dots
I adhered this card to the top of the gift instead of making a bow.  I really like making these types of tags for packages, especially when they're personalized with initials.  I love how the brads mimic the snaps on a onesie, too.


Card Details:
  • Card Base - Recollections (A6)
  • Papers - patterns and cardstock by Recollections
  • Cricut Cuts - monkey from Create a Critter, page 46; scalloped background from Elegant Edges, page 23; "baby" from Simply Sweet, page 75
  • Embossing - scalloped background with Intricate Swirls by The Paper Studio; rectangle background with Mesh Texture by The Paper Studio
  • Other - ribbon by The Ribbon Boutique; monkey, scalloped background, and "baby" on pop dots; flower and gemstone embellishment by Recollections
My mom told me about embossing folders by the Paper Studio now in stock at Hobby Lobby.  I bought a few (okay...five!) and am really liking them.  I used two on the monkey card above and am pleased with the result.  The folder is made identically to a Cuttlebug embossing folder and fits into the Cuttlebug without any special "sandwiching" techniques.

I'm entering the monkey card into the following challenge:
Die Cuttin' Divas:  Challenge #32 - Zoo Crazy

Hope you liked my few projects.  I promise more to come -- and more frequently -- in the coming days!

Tell me what you've been creating and what's been happening in our Cricut world... :)

Friday, July 29, 2011

Butterfly Diaper Cake & Card

It must be "baby season", because I have another diaper cake for you today!


This confection is for a sweet little girl with a butterfly-themed nursery.  As soon as I saw this paisley ribbon at Hobby Lobby, I knew it was perfect for her pink and green room.  I was still stuck on the topper until a few days ago when she came two weeks early -- uh oh!  Then I found a cute monogram coat hanger on Michael's "fabulous finds" aisle with her initial.

Project Details:
  • Papers - My Mind's Eye - Simply Delightful and Bohemia
  • Cricut Cuts - butterfly from Create a Critter, page 64
  • Cuttlebug Embossing - D'vine Swirls, Kassie's Brocade, Perfectly Paisley, Swiss Dots, Victoria
  • Ribbon - pink satin by Robert Stanley Collection; paisley by The Ribbon Boutique
  • Floral - pink floral bush from Hobby Lobby
  • Other - lots of inking on butterflies with Colorbox petal point pads in green and pinks

I also made a matching card:

Card Details:
  • Card Base - DCWV Brights (A2)
  • Papers - green stripes by American Crafts - Everyday paperpack; pink textured and non-textured cardstock by The Paper Studio; black and white cardstock from scraps
  • Cricut Cuts - butterfly from Create a Critter, page 64; scalloped background from Elegant Edges, page 23
  • Cuttlebug Embossing - inner butterfly wings with D'vine Swirls; scalloped background with Swiss Dots; pink background with Perfectly Paisley
  • Other - inking with pink Colorbox petal point ink pads; ribbon by The Ribbon Boutique; gemstones from Michaels dollar bin

I had so much fun making such a girly project!  It made me fall in love with the Perfectly Paisley embossing folder that had been sitting unopened in my Cuttlebug bin for far too long...now I want to use it on everything!

I'm entering this project into the following challenge:

Queen of My Craftroom:  Mojo Monday Challenge - Create a Critter Cartridge

Tuesday, June 28, 2011

"Sea" Baby Soon Card

I'm playing along with Tacky Tuesdays this month for the first time -- and I'm so excited!  Their challenge calls for using a sea creature cut and the word "sea" -- which works out great since I had a sea-themed, welcome baby card I needed to make.  How cool, huh?  Here's the resulting card:


Card Details:
  • Card Base - Studio G (5x5")
  • Papers - distressed papers by My Mind's Eye: Bohemia; textured cardstock by The Paper Studio
  • Cricut Cuts - sea creatures from Create a Critter; jellyfish, page 41; octopus, page 42; fish, page 43; seaweed from Create a Critter, page 43; waves background made by layering nine cuts of <hrts1_s> (Border) from Elegant Edges, page 26
  • Cuttlebug Embossing - seaweed with Victoria
  • Other - inking with Colorbox cyan, green, and violet ink pads; doodling with white Gelly Roll pen; sentiment printed with my computer; sea creatures on pop dots
 Check out the Tacky Tuesdays challenge on Facebook and play along!

Tuesday, June 21, 2011

Sweet Kitten Birthday Card

My mom is here and the Cricut has been a-chirpin'!  She opened her Kate's ABC cartridge, and it didn't take long for me to borrow it for this sweet kitten card.  (When I say "not long", I mean...like, 2 minutes.)

Card Details:
  • Card Base - shaped card by Studio G (5" diameter)
  • Papers - patterned paper by Colorbok; aqua paper by My Mind's Eye: Simply Delightful; purple and green cardstock from scraps; textured cardstock by The Paper Studio
  • Cricut Cuts - kitten/flower/butterfly from Kate's ABCs, page 53; scalloped background from Elegant Edges, pages 23 and 50
  • Cuttlebug Embossing - cat with D'vine Swirls
  • Other - doodling with white Gelly Roll pen; inking edges with ultramarine and lavender Le Plume II markers and purple Colorbox ink pad; sentiment stamp by Hampton Ink; ribbon by Basic Narrows.
The cat's tail was connected to the grass cut originally on Kate's ABCs, but I clipped them apart so I could have the tail come around the front of the sentiment stamp.  Also, I was having such a hard time with the bow that my mom tied it for me.  She's so great at bows!

I'm submitting this card to Birthday Sundaes Challenge #14 - Shaped Card.

Monday, June 20, 2011

Pink Butterfly Birthday Card

I hope all the special guys in your life had a great Fathers Day yesterday.  The day was super special because it was also my mom's birthday!

Even though she lives seven hours away, we have a close relationship and talk on the phone most everyday -- sometimes multiple times.  Since we both got our Expressions in March, many of our conversations are now about Cricut and papercrafting.  But my mom is talented many, many areas -- cross-stitch, home decor, flower arranging, crochet, and anything that requires creativity and precision.  (You see, when my mom needs to center something, she whips out the measuring tape; I just eye-ball it.  She's that exact and takes pride in everything she does.)  She's also a loving grandmother to my son and the best cook I know; there's nothing like Mama's cooking.

She and my dad are actually coming for a visit and will arrive this evening -- I'm so excited!

So without further ado, here's the card I made for my mom:

Card Details:
  • Card Base - Easel Card (5x5")
  • Papers - patterned papers from My Mind's Eye: Simply Delightful; solid cardstock by The Paper Studio
  • Cricut Cuts - butterflies from Florals Embellished, page 64; scalloped background and border from Elegant Edges, page 56
  • Cuttlebug Embossing - Kassie's Brocade on pink background
  • Other - pink ribbon from stash; gems from Michaels dollar bin; doodling with white Gelly Roll pen; sentiment printed from my computer

Thursday, June 16, 2011

Pink Purse Birthday Card

I did some early morning crafting while my toddler son was preoccupied with his newest DVD obsession, Leap Frog's Letter Factory.  It's educational -- teaches phonics to pre-readers -- and he loves it, so I don't feel too, too guilty letting him watch it during breakfast.

I made another card requested by my cousin; this one is for a girly-girl who likes zebra print and the color pink.  Wouldn't you know, I didn't have a single piece of zebra print in my paper collection...?!  I made a quick trip to Michaels last night to remedy that situation and also found some sentiment stamps on clearance.  I love bargains!

Here's the girly-girl card -- I'm really diggin' it!

Card Details:

  • Card Base - DCWV Brights Collection (A2)
  • Papers - patterns by The Paper Studio; solids and cardstocks from scraps
  • Cricut Cuts - purse and hearts from Create a Critter, page 36 (accessory and phrase); scalloped border from Elegant Edges, page 30 (border)
  • Cuttlebug Embossing - D'vine Swirls on purse
  • Other - sentiment stamp by Hampton Ink

The only purse cuts I could find in my collection were from Create a Critter.  Both were pretty basic, so I added the flap to the front of this purse to jazz it up.  It's simply the cutout portion between the purse body and handle.  Pretty cute, huh?

I must admit, the whole time I was making this card, I was salivating over the purses from Kate's ABCs.    I bought it for my mom a while back when it was on sale at Joanns for $19.99, and it's even sitting on my craft table!  But I had willpower and didn't open it -- even though she said I could if I absolutely had to.    I might be adding that cart to my wish list.

Note:  I'm submitting this project to Paper Cutz Challenge #95 - Anything Goes with Pink, Black, and White Only.

Tuesday, June 14, 2011

Adore Wedding/Anniversary Card

My blog may be quiet, but my Cricut hasn't been!  It's been frantically chirping with Fathers Day and birthday cards.  By this weekend -- hopefully -- I should be able to share a few "shh-shh" projects with you.

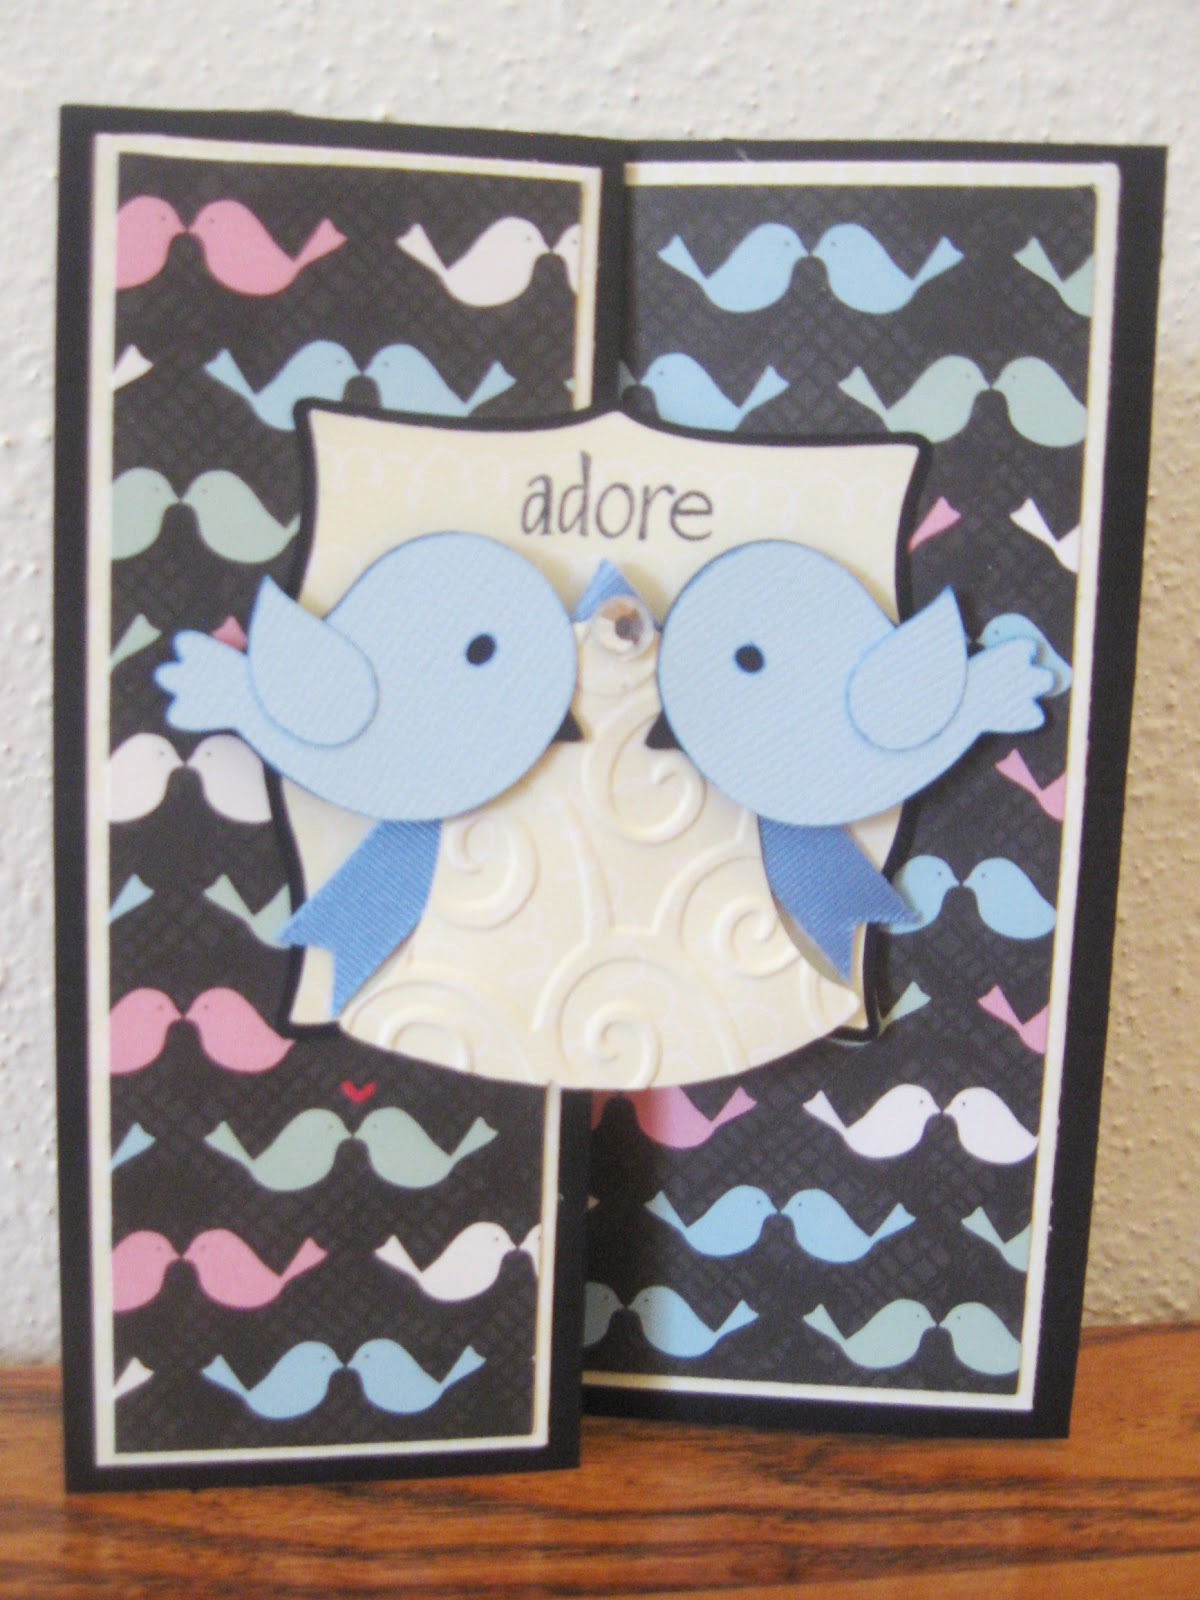
In the meantime, I can post a wedding/anniversary card I made this morning.  I've been dying to use this Heidi Grace patterned bird paper, and a card for two nature lovers was a good reason.  It's also two firsts for me -- my first Z-fold card and my first time to stamp a sentiment on the front!  Here's the entire card stretched:


And folded to view just the front:

Card Details:

  • Card Base - black cardstock (A6)
  • Papers - patterned and cream cardstock by Heidi Grace; blue textured cardstock by The Paper Studio
  • Cricut Cuts - scalloped background from Elegant Edges, page 51 (<btfly2_s>/Shadow); bird from Create a Critter, page 45, legs snipped and one image flipped; bell from Stretch Your Imagination, page 72 (Blackout), handle and heart snipped.
  • Cuttlebug Embossing - D'vine Swirls on bell
  • Other - ribbon by American Crafts; "adore" sentiment by The Paper Studio; gem from Michaels dollar bin; inking around edges of bird with sky blue Le Plume II marker

I'm entering this project into the following challenges:

Cricut Cardz Challenge #78 - Wedding Card
Die Cuttin' Divas: Challenge #19 - Wedding Bliss (without hearts)
Fantabulous Cricut:  Challenge #64 - Wedding Wishes (use white and a bell)
Paper Playtime:  Challenge #48 - Z-Fold Card

Friday, June 10, 2011

Blue & Silver Wedding Card

My cousin has commissioned me to create a few cards for her -- which means I now have a paying customer!  (Or at least an excuse to buy more goodies with the proceeds.)

The first card is a wedding congratulations card for her friends, requested with the colors blue and silver.  Here's my resulting design:


Card Details:

  • Card Base - Studio G (5"x5")
  • Papers - blue damask from Recollections: All Seasons; all cardstock from The Paper Studio except cardstock with luster, which is Bazzil Bling
  • Cricut Cuts -  wedding bells from Wrap It Up, page 36; scalloped background from Elegant Edges, page 56 ("bird3_s")
  • Cuttlebug Embossing - scalloped background with Kassie's Brocade
  • Other - ribbon by American Crafts; doodling with white Gelly Roll pen
I really like how parts of the wedding bell and ribbon cut with Bazzil Bling cardstock shimmer when they catch the light.  It adds a lot of dimension in addition to the background and cuts being elevated with pop dots.

I'm entering this project into the following challenge:

Cricut Cardz Challenge #78 - Wedding Card

Thursday, June 2, 2011

Elegant Cake Birthday Card

I combined several challenge requirements today and came up with a shaped birthday cake card featuring the colors tangerine and yellow.  Wouldn't you know -- after creating this card, I have a sudden craving for orange cake!

Card Details:
  • Card Base - shaped (8 inch) card from Birthday Bash, page 25, on orange cardstock from scraps
  • Papers - patterns from Recollections All Seasons paperpack; orange paper for cake from Simply Delightful: My Mind's Eye; solids from Bazzil Bling Textured Cardstock
  • Cricut Cuts - birthday cake from Birthday Bash, page 25; sentiment from Birthday Bash, page 67 (card/tag); tag created from "swirl1_s" on Elegant Edges, page 25
  • Cuttlebug Embossing - Kassie's Brocade on cake layers
  • Other - doodling with white Gelly Roll pen; tag elevated with pop dot

I think the result is really elegant and perfect for a summer birthday.  All that bright pink, tangerine, and yellow makes me of how hot it will be in August.  (Or even now, since we're hovering around 95ºF these days!)

I'm submitting this project in the following challenges:

BBTB2: Challenge - Celebrations/Birthday Cake
Cooking with Cricut: Challenge #32 - Color Challenge
Cricut Cardz Challenge: Challenge #77 - Use Card Feature

Saturday, May 28, 2011

Nice Buns Card

Memorial Day Weekend always feels like the start of summer to me.  This year is no exception -- especially after viewing all the summer-inspired projects on BugBites' "Grillin' & Chillin" Bug Hop.

I'm entering the hop's challenge with this card:

Card Details:
  • Card Base - Studio G (5x5")
  • Papers - plaid from KI Memories Heirloom Collection; blue and orange distressed papers and brown damask for patty from Simply Delightful: My Mind's Eye; gray textured cardstock from The Paper Studio; all others from scraps
  • Cricut Cuts - hamburger from Simply Charmed, page 49; utensils from Playtime, third layer of "Jim" cut; bug from Doodlecharms, page 92; background in plaid from Elegant Edges, page 63.
  • Cuttlebug Embossing - top hamburger bun with Swiss Dots; lettuce with D'vine Swirls; tomatoes with Dots & Spots; pickle with Distressed Stripes.
  • Other - inking around plaid layer with brown ink pad by Stampabilities and lots of doodling with white gel pen; also highlighted sesame seeds on buns with yellow marker.
A few words about the hamburger patty -- it looks a lot browner in person.  In the photo it looks like a tasteless, gray burger you get at a school cafeteria!  Oh well. :)

I also wanted my critter to be one of the ants I saw on the blog hop, but I couldn't find an ant cut on any of my cartridges.  I settled on making the bug from Doodlecharms in black to represent the critter.

We often get together with friends for cookouts in the summer.  I thought this would be a neat -- and cheeky, haha! -- thank you card to send a host.