Easter is right around the corner, so it's time to bring out those eggs and celebrate with Fantabulous Cricut! This week's challenge is to make a project featuring Easter eggs. I have a super special project for you today -- an Easter layout I recently made for my son's scrapbook:
I had so much fun adding lots of Easter details. Here's some close-ups:
Project Details:
Papers - patterned paper by The Paper Studio; cardstock by Recollections
Cricut Cuts - "Hoppy Easter" from Celebrate with Flourish; eggs and basket from Doodlecharms, page 30; bunny from Create a Critter, page 26
Embossing - eggs with Cuttlebug's Perfectly Paisley and Swiss Dots and The Paper Studio's Doodleborders; basket with The Paper Studio's Mesh Texture
Other - all cuts on pop dots
I love this layout because it's the last time Jonathan agreed to sit with the Easter bunny -- even though it only lasted about three seconds until he burst into tears. It was stressful at the time, but hilarious now! He still has an intense fear of "EB" and avoided him like the plague at this year's egg hunt.
Are you ready to show off your egg projects? Head over to Fantabulous Cricut for Challenge #105 - EGG-ceptional Easter!
I'm entering this project into the following challenges:
Hi, friends! I'd like to share one of my mini-diaper cakes with you today. I made this airplane and helicopter-themed concoction for one of the gals from my Mothers of Preschoolers group. We surprised her with a mini-shower after our meeting yesterday.
Here's some closeups of the topper and Cricut cuts:
Project Details:
Papers - Recollections
Cricut Cuts - airplanes and helicopter from Beep Beep; cloud from Create a Critter, page 65 (accessory)
Embossing - clouds with Cuttlebug's D'vine Swirls
Other - ribbon by The Ribbon Boutique
I wasn't sure of her nursery theme, so I let my son pick a teether toy as the inspiration piece. I was happy with his choice, because I got to use my brand new Beep Beep cartridge (another birthday present from hubby) for the first time!
Hooray for Monday and the start of another challenge at Fantabulous Cricut! This week is all about using fancy trims on our projects -- fabric, lace, or any other type of trim. Yes, friends, it's the perfect reason to get frilly!
I love ribbon, but as a new crafter, I don't have an extensive assortment of colors and styles. I was super excited to learn about our sponsor, Really Reasonable Ribbon, and how they supply assortments of ribbon at...well, really reasonable...prices! I received some great free product from them and made this fun card with three types of ribbon they supplied:
Card Details:
Card Base - Recollections (A7)
Papers - patterns from Recollections' Charming paper pack; cardstock by Recollections
Cricut Cuts - owl from Create a Critter, page 25
Embossing - wings with Cuttlebug's D'vine Swirls
Other - trims from Really Reasonable Ribbon
The wide, ruffled turquoise ribbon that Really Reasonable Ribbon sent me was a perfect match to this paper pack I'd been neglecting for awhile. I added a lace trim on top of the turquoise and also used white ric-rac around the owl's frame to add interest. I'm really pleased at the result!
I also got to use some of my new K Andrew Designs Art Stamps, too! The inside sentiment is from the Crafty Friends set I won from Paper Playtime awhile back.
Do you like trims? If so, go show off all your best ribbons at Fantabulous Cricut this week for our Fancy Trims challenge!
You might remember how I had big ambitions to make two dozen of these dump truck valentines for my son's preschool class. Well, they were really involved, so I scrapped that idea in favor of a simpler (and faster!) tiny valentine:
Card Details:
Card Base - 3x3"
Papers - all by The Paper Studio
Cricut Cuts - sentiment from Create a Critter, page 49
Embossing - heart background with The Paper Studio's Doodle Borders
Other - ribbon from stash
I'm sad I had to abandon the dump truck cards, but this mama just didn't have 20 minutes per card before next Friday. And the three I'd completed went to a good cause -- that definitely makes me feel better!
I'm entering this project into the following challenges:
And here's my second of two explosion boxes for my son's preschool teachers. For this box, I chose a snow theme and also included the classroom panda mascot.
The outside...
...and the inside exploded!
Here's two closeups of the snowflakes and 3D elements:
Project Details:
Papers - patterned paper by ADT - Wisterberry; solid cardstock by Recollections
Cricut Cuts - 3D snowman from Winter Woodland, page 74; panda from Create a Critter, page 58; scarf for panda from Winter Frolic, page 35; snowflakes and tag panel from Winter Woodland, page 35; "For You" sentiment from Winter Frolic, page 56
Embossing - lots of layers with Cuttlebug's Snowflakes
Other - plaid ribbon by American Crafts; white ribbon from stash; snowflakes and sentiment on pop dots
The lighter-weight paper helped this explosion box stay "open" more than my previous one -- except for the panel holding the gift card, of course. I didn't create a flap for the gift card since it actually matched the colors and theme so well; I just used my ATG gun to smack it down. I'm also pleased with the bow on top of the lid. I don't make pretty bows, but this one turned out quite nice!
I'm entering this project into the following challenge:
I have a big achievement this week -- I made an explosion box...!!!
I've always admired the explosion boxes I've seen others make, but I thought they were too involved and too complicated for me. But with Christmas coming, I was inspired to make something special to hold gift cards for my son's preschool teachers. This box has a red, green, and Christmas tree theme and also features a panda since that's the mascot for my son's classroom. Here's the outside:
Open it up, and here's what's inside...
And a few closeups of the panels...
Project Details:
Papers - patterned papers from Recollections - Believe paper pack; solid cardstock by Recollections; gold paper by Creative Memories
Cricut Cuts - 3-D tree from Winter Woodland, page 73; panda from Create a Critter, page 58; scarf for panda from Winter Frolic, page 35; ornaments from Winter Frolic, pages 64 and 65; tag from Winter Frolic, page 65; "Christmas Wishes" sentiment from Winter Frolic, page 67; "A Gift for You" sentiment from Winter Frolic, page 43
Embossing - tree, ornament pieces, and outside side panels with Cuttlebug's Victoria
Other - ornaments inked with Colorbox red ink pad; gold curling ribbon from stash; sentiments on pop dots
I'm super pleased with the result and hope his teacher likes the way we presented her gift card. The only thing I'd change is backing the patterned papers with cardstock -- it made the flaps a little too heavy to stay "exploded" when the box is open. Next time, I'll either skip the backing and/or choose lighter-weight papers.
My favorite detail is how the scarf is curled to make it appear to be blowing in the wind. It had a more utilitarian beginning, though -- I had to curl so it would fit in the box when folded! I also like the holly paper I used on the inside panels. It kinda looks like bamboo, which is perfect for the panda!
I hope you enjoyed my first explosion box -- it took three naptimes to make! I'm entering this project in the following challenges:
Happy Monday! It's time for another challenge at Fantabulous Cricut! The theme for Challenge #87 is Thank You -- your card or project must include the words "thank you" somewhere on it.
I'm looking forward to a great Thanksgiving with family this week, so I had to use this opportunity to make just one more turkey card:
Card Details:
Card Base - Recollections (A6)
Papers - patterns by The Paper Studio; cardstock by Recollections
Cricut Cuts - turkey from Create a Critter, page 70
Embossing - feathers with Cuttlebug's D'vine Swirls and Swiss Dots
Other - brad by 7 Gypsys - Angelo; "Thank You" stamp from Michaels $1 bin; yarn from stash; turkey on pop dots
What are you thankful for? Show us with a Thank You project at Fantabulous Cricut -- I can't wait to see what you create!
I'm entering this card in the following challenges:
I'm so honored to be featured as a guest designer on Decorate to Celebrate today! I love this craft blog and all the fabulous party ideas shared by the designers and challenge participants. I just wish I had more events to try all those great ideas! (Wait, did I just ask to get busier...?! Uh oh.)
I did help host a baby shower last weekend, which fits -- with a little stretching -- into Decorate to Celebrate's theme for Challenge #8 - Baby Birthday. We celebrated the impending birthday of Baby Sophia with a Curious George themed shower.
For the shower, I made a monkey decorations, monkey favors, Curious George invitations, and a banner:
Invitation:
Card Base - 5x5"
Paper - Recollections
Other - Curious George image edited with Adobe Photoshop to be a dark-haired baby wrapped in pink blanket; invitation text arranged with MS Publisher; ribbon by The Ribbon Boutique
Monkey Decorations:
Cricut Cut - monkey from Create a Critter, page 46, several monkeys cut at various sizes (7-9 inches)
Paper - Recollections
Hung the monkeys on vines draped from the ceiling around the room.
Banana Favors:
Cricut Cut - monkey from Create a Critter, page 46, cut at 2.5 inches.
Paper - Recollections
Sentiment - "Thanks for going BANANAS for Sophia" text arranged with MS Publisher; printed on 1" strips of red cardstock
Wrapped the sentiment strips around the bananas and secured with a staple; double-stick tape then secured the monkeys over the staple.
Banner:
Paper - Recollections
Cricut Cuts - banner from Birthday Bash, page 64; font also from Birthday Bash; monkey from Create a Critter, page 46
Other - ribbon by The Ribbon Boutique
The mom-to-be and guests really seemed to love all the Curious George decorations, and I had a blast using my Cricut for party purposes.
If you have a baby birthday (or any event) to plan, be sure to share your creations at Decorate to Celebrate now through October 5. And many thanks to Rhonda and Amy at DTC for featuring me as a Guest Designer today! Now, get to crafting! :)
My project is a little different than your typical pirate-themed craft -- it's for a girl. (Yes, girls can like pirates, too!) I used pinks and greens for this simple card, as it's for one of my son's toddler playmates. She loves Jake and the Neverland Pirates on The Disney Channel and any kind of animal, so I chose this cute octopus cut from Create a Critter:
Card Details:
Card Base - Studio G (5x5")
Papers - pink polka dots by Heidi Grace Designs; textured cardstock by Bazzil Basics; all other cardstock by Recollections
Cricut Cuts - pirate octopus from Create a Critter, page 42
Embossing - Doodle Borders by The Paper Studio
Other - inking with pink Stampabilities ink pad; octopus on pop dots
Hope you like my clean-and-simple card. Now, it's your turn to head over to Fantabulous Cricut to share your own pirate creation -- ARRRG! :)
I've been swamped since mid-August with substitute teaching at my son's preschool, three baby showers, and preparing for our first MOPS meeting of the year. I'm finally seeing light at the end of this busy tunnel -- and it's a craft light! Hubby is treating me to a scrapbooking retreat next weekend at Rivendell Ranch. If I can just make it through the next five days of craziness, I get to relax with my Cricut, Cuttlebug, and absolutely no responsibilities.
I have made a few projects over the past few weeks, one of which you'll be seeing as a guest spot on Decorate to Celebrate while I'm away in crafting paradise. But for now, I can show you two cards I made to accompany baby shower gifts:
Card Details:
Card Base - two <onesie> cuts from Wrap It Up, cut at 6.5 inches, adhered together above sleeves
Papers - cardstock by Bazzil Basics
Cricut Cuts - onesie from Wrap It Up, page 53; "P" from Birthday Bash (font and font shadow)
Embossing - "P" with Cuttlebug Swiss Dots
Other - brads by 7 Gypsies - Angelo; "P" on pop dots
I adhered this card to the top of the gift instead of making a bow. I really like making these types of tags for packages, especially when they're personalized with initials. I love how the brads mimic the snaps on a onesie, too.
Card Details:
Card Base - Recollections (A6)
Papers - patterns and cardstock by Recollections
Cricut Cuts - monkey from Create a Critter, page 46; scalloped background from Elegant Edges, page 23; "baby" from Simply Sweet, page 75
Embossing - scalloped background with Intricate Swirls by The Paper Studio; rectangle background with Mesh Texture by The Paper Studio
Other - ribbon by The Ribbon Boutique; monkey, scalloped background, and "baby" on pop dots; flower and gemstone embellishment by Recollections
My mom told me about embossing folders by the Paper Studio now in stock at Hobby Lobby. I bought a few (okay...five!) and am really liking them. I used two on the monkey card above and am pleased with the result. The folder is made identically to a Cuttlebug embossing folder and fits into the Cuttlebug without any special "sandwiching" techniques.
I'm excited for back-to-school time. My toddler isn't back in MDO yet, and I'm practically counting the minutes until his first day back. Mommy is ready for some crafting time! So this week's theme at Fantabulous Cricut is perfect for my current state of mind -- Challenge Me Monday #76 is Back to School! You're encouraged to use your "ABCs" and "123s" on your project, too.
My project is a wall-hanging for my son's teachers. He's in the Peaceful Pandas class this year:
Project Details:
Papers - textured cardstock by Bazzil Basics; blue and orange patterns by Recollections; green stripes by American Crafts - Play.
Cricut Cuts - panda from Create a Critter, page 58; crayons and glue from Simply Charmed, pages 52 and 54; banner from Birthday Bash, page 63; font for PANDAS from Birthday Bash.
Other - googly eyes and white crochet thread from my mom's stash
This panda is a really big critter; I made him fit-to-page, which equaled 11 inches tall. My son also helped by gluing on the googly eyes.
Join us over at Fantabulous Cricut by adding your back-to-school project. Happy crafting!
The record-setting temperatures may say it's summer, but the calendar shows school is just around the corner!
To welcome the new academic year, Celebrate the Occasion is featuring back-to-school projects this week. So open that new box of crayons and join our design team for some great school projects!
My project is a double-page scrapbook layout of my son's Beautiful Butterflies class from last year. It was his first year at preschool, and he absolutely LOVED it. His teachers were the best, and he made lots of little friends that he's eager to see again when his school begins after Labor Day.
Project Details:
Papers - patterns by American Crafts: Everyday; cardstocks by C'ordinations and The Paper Studio
Cricut Cuts - butterflies from Create a Critter, page 64; crayons from Simply Charmed, page 52; scissors and glue from Simply Charmed, page 54; bear from Doodlecharms, page 105; backpack from Doodlecharms, page 119; car from Boys Will Be Boys, page 61; "beautiful" from Paisley, page 53; font for "BUTTERFLIES" is Opposite from Opposites Attract
Other - lots of inking with Colorbox petal point ink pads and Le Plume II markers
I can't believe I used seven cartridges on this project! Maybe I was having a little too much fun making die cuts of preschool objects...
You can link up your own back-to-school project at Celebrate the Occasion now through Sunday, August 14, for a chance to win a $25 gift certificate from PaperTrey Ink. I can't wait to see your school-themed projects!
It must be "baby season", because I have another diaper cake for you today!
This confection is for a sweet little girl with a butterfly-themed nursery. As soon as I saw this paisley ribbon at Hobby Lobby, I knew it was perfect for her pink and green room. I was still stuck on the topper until a few days ago when she came two weeks early -- uh oh! Then I found a cute monogram coat hanger on Michael's "fabulous finds" aisle with her initial.
Project Details:
Papers - My Mind's Eye - Simply Delightful and Bohemia
Cricut Cuts - butterfly from Create a Critter, page 64
Ribbon - pink satin by Robert Stanley Collection; paisley by The Ribbon Boutique
Floral - pink floral bush from Hobby Lobby
Other - lots of inking on butterflies with Colorbox petal point pads in green and pinks
I also made a matching card:
Card Details:
Card Base - DCWV Brights (A2)
Papers - green stripes by American Crafts - Everyday paperpack; pink textured and non-textured cardstock by The Paper Studio; black and white cardstock from scraps
Cricut Cuts - butterfly from Create a Critter, page 64; scalloped background from Elegant Edges, page 23
Cuttlebug Embossing - inner butterfly wings with D'vine Swirls; scalloped background with Swiss Dots; pink background with Perfectly Paisley
Other - inking with pink Colorbox petal point ink pads; ribbon by The Ribbon Boutique; gemstones from Michaels dollar bin
I had so much fun making such a girly project! It made me fall in love with the Perfectly Paisley embossing folder that had been sitting unopened in my Cuttlebug bin for far too long...now I want to use it on everything!
I'm entering this project into the following challenge:
I'm so excited to be featured as guest crafter today at Carson's Creations -- many thanks to Georgiana for such an honor! If you've come from Georgiana's blog, thanks for visiting! If not, please visit Georgiana and check out her amazing creations.
I'm sharing one of my favorite craft projects with you today -- a diaper cake decorated with Cricut die cuts!
Diaper cakes are wonderful baby shower gifts. I was blessed by a diaper cake when my son was born, and I began making them for my expectant friends. I learned to make diaper cakes from this YouTube video by CreativeBabyShowers:
For this diaper cake, I chose a sea creature theme; it's the recipient's nursery theme and colors. Once you've made your diaper cake base as shown in the video, you'll need the following items:
completed diaper cake base
ribbons in two widths (Mine are 1.5 and 2.5 inches.)
die cuts (I used cuts from Create a Critter and Playtime cartridges; see end of entry for more details.)
floral stems or bush
double-stick tape
scissors
STEP 1: RIBBON
Wrap the wider ribbon around the diaper cake layers to hide rubber bands. Secure with double-stick tape placed along rubber band line every few inches. Repeat with the smaller-width ribbon layered on top of the first ribbon, again securing with double-stick tape.
STEP 2: DIE CUTS
Place your die cuts around the diaper cake as desired; secure to ribbon with double-stick tape.
STEP 3: FLORAL ACCENTS
Cut small sprigs from your floral stem or bush and use as accents for the cake topper and around the die cuts. Stems need to be approximately 3 to 4 inches long. Wedge the stems between or under the rolled diapers; do not use glue, as it will damage the diapers. I used a greenery bush that reminded me of seaweed to keep with the sea creature theme.
STEP 4: TOPPER
Secure die cut as topper of the diaper cake. I used regular transparent tape to fasten the die cut to a wooden skewer and stuck the skewer between diapers. But don't limit yourself to just die cuts -- I often use a small stuffed animal or teething toy as a topper.
And now you have a super cute diaper cake! Below are some close-ups of the topper and die-cuts for this sea creature diaper cake:
Cricut Cut Details:
All animals are from Create a Critter; frog, whale, seahorse, jellyfish, and octopus cut at 3.5 inches; turtle and fish cut at 2.5 inches.
Topper tag is <princess> and <princess_s> from Playtime, cut at 2.25 inches.
Letters for "LANDON" from Opposites Attract using Opposite font, cut at 1.25 inches.
Embossing for topper tag is Spots & Dots Cuttlebug folder.
Textured cardstock is Core'dinations; non-textured cardstock is from The Paper Studio.
Inking with cyan and green Colorbox petal point ink pads.
I've enjoyed sharing this project with you today. Thanks again to Georgiana for such a special honor! I'm really, really proud of how this project turned out, so I'm entering it into a couple challenges, too:
I hope you all had a great Independence Day! Our family had a relaxing day at home, and I had a little time tonight for crafting.
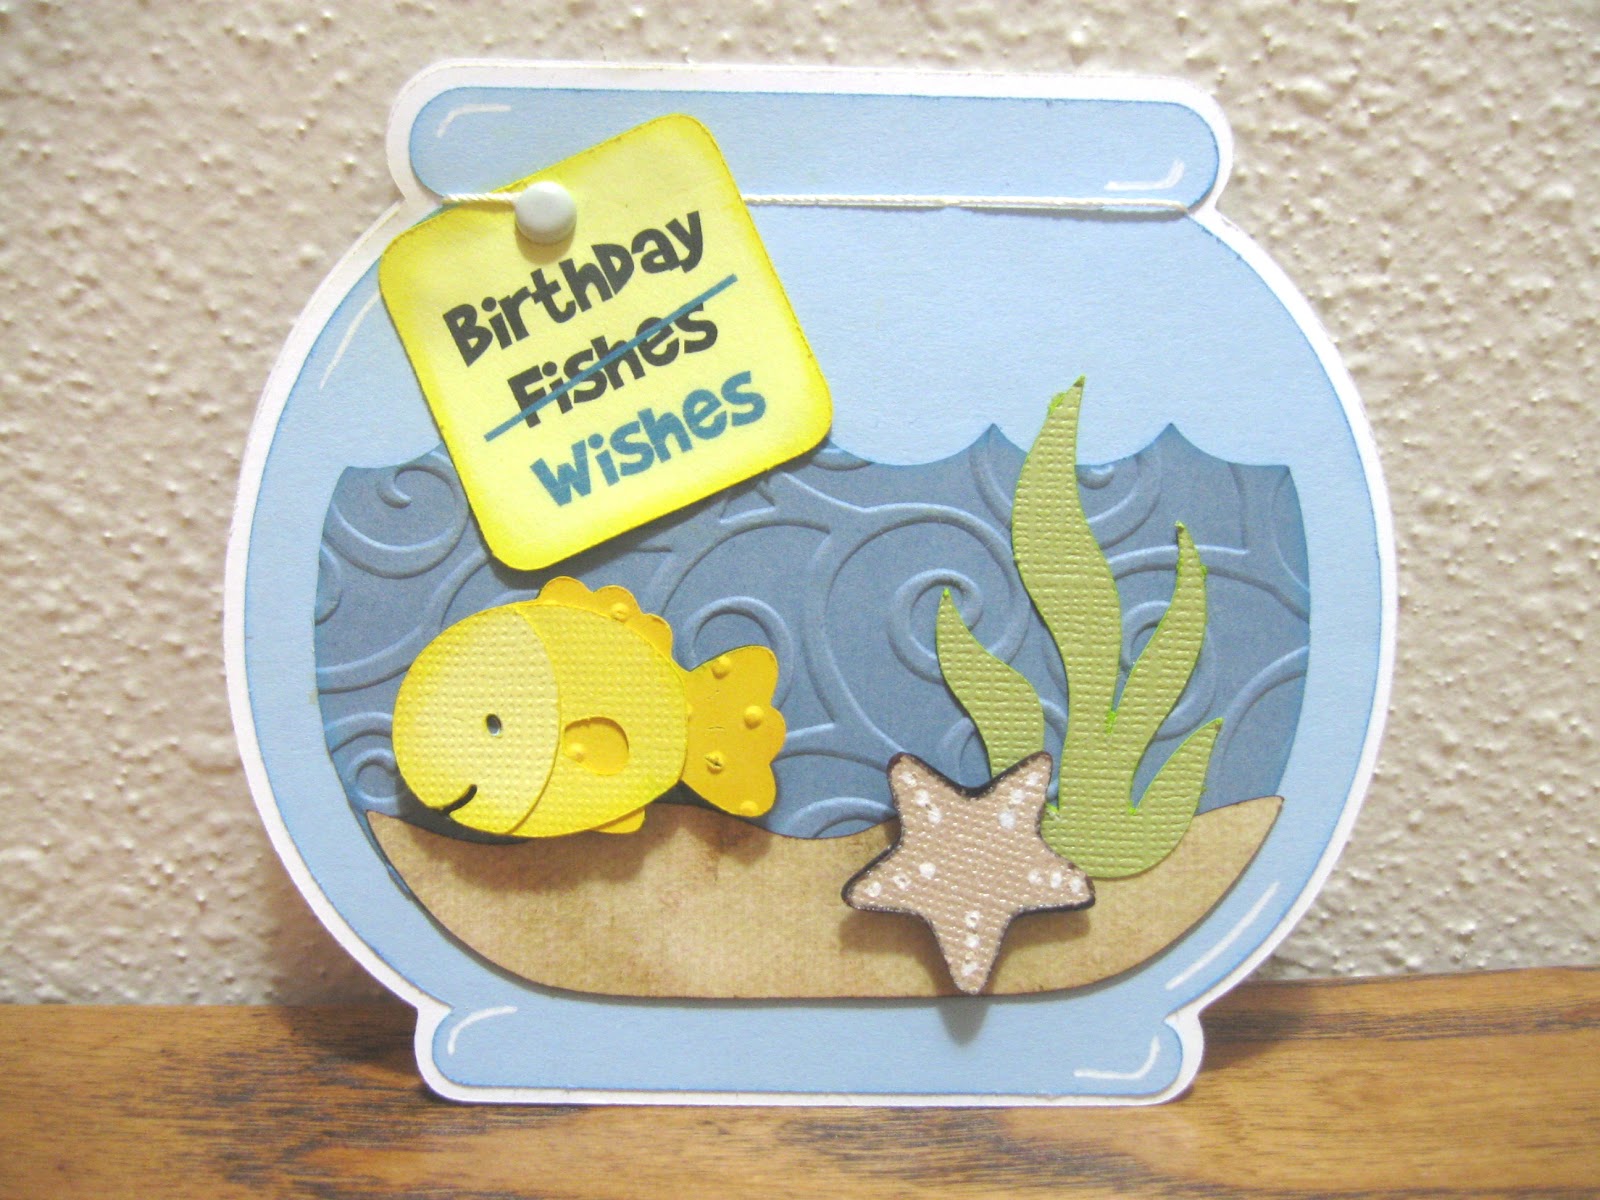
This card is for my father-in-law's birthday later this week. He enjoys tending his aquarium, so I decided to make him a fishbowl card.
Card Details:
Card Base - fishbowl from Create a Critter, page 43, cut at 4 inches; secured with brad
Papers - textured cardstock by Bazzil Bling; all other cardstock from scraps; distressed brown paper from My Mind's Eye - Simply Delightful
Cricut Cuts - from Create a Critter: fishbowl and fish, page 43; starfish, page 41 (accessory)
Cuttlebug Embossing - water with D'vine Swirls; fish (Layer 1) with Swiss Dots
Other - brad by 7 Gypsies - Angelo; sentiment printed from my computer; fish and starfish on pop dots; doodling with white Gelly Roll pen; inking with Colorbox yellow and cyan ink pads
Without a Gypsy, I can't make shaped cards too easily -- but my solution is making a card held together by brads. It's different, but I like it. :)
I'm entering this card into the following challenges:
I'm playing along with Tacky Tuesdays this month for the first time -- and I'm so excited! Their challenge calls for using a sea creature cut and the word "sea" -- which works out great since I had a sea-themed, welcome baby card I needed to make. How cool, huh? Here's the resulting card:
Card Details:
Card Base - Studio G (5x5")
Papers - distressed papers by My Mind's Eye: Bohemia; textured cardstock by The Paper Studio
Cricut Cuts - sea creatures from Create a Critter; jellyfish, page 41; octopus, page 42; fish, page 43; seaweed from Create a Critter, page 43; waves background made by layering nine cuts of <hrts1_s> (Border) from Elegant Edges, page 26
Cuttlebug Embossing - seaweed with Victoria
Other - inking with Colorbox cyan, green, and violet ink pads; doodling with white Gelly Roll pen; sentiment printed with my computer; sea creatures on pop dots
Check out the Tacky Tuesdays challenge on Facebook and play along!
I have a quick (but cute, if I do say so) card for you today; it's also the last of eight cards my cousin asked me to make for her. This birthday card is for one of her nurse anesthetist co-workers. We chose a sleeping owl cut since that's what they do all day -- put people to sleep!
Card Details:
Card Base - Studio G (5x5")
Papers - patterns by American Crafts Play paperpack; textured cardstock for owl by Core'dinations; blue and orange cardstock from scraps
Cricut Cuts - owl from Create a Critter, page 25; tag is <dream> from Lovely Floral; ZZZs are Opposite font from Opposites Attract
Cuttlebug Embossing - wings with D'vine Swirls
Other - sentiment stamp by Hampton Ink; ribbon by Basic Narrows from Michaels
My son and I had so much fun creating this tiger-themed Fathers Day card for my hubby. Hubby loves tigers, so we chose to modify a cat from Create a Critter with orange and black stripes -- and it looks very tiger-like!
Of course, mommy did most of the designing, but my two-year old son is getting quite proficient at loading the cutting mat for me! He wants to pretend "JonJon's cricut" while I'm working, so I now have to be sure the power cord is unplugged when not in use.
Here's our resulting easel card:
Card Details:
Card Base - Easel Card (5x5")
Papers - striped paper from My Mind's Eye: Magnolia; textured cardstock by The Paper Studio; all others from scrap
Cricut Cuts - all cuts from Create a Critter; tigers are <cat1> on page 29; flag from page 28 without Layer 1; sentiment from page 49 (phrase); letters for "GRRREAT" from Opposites Attract using both Opposite and Opposite Shadow functions.
Cuttlebug Embossing - Dots & Spots on green background layer
Other - doodling and faux stitching with white Gelly Roll pen; inside sentiment printed with my computer; pop dots elevate tigers, flag, and "GRRREAT" sentiment.
My son created artwork with his crayons to insert into the envelope, too. (Just like Mommy, he does his best work in PJs and with a snack. See the rogue animal cracker?)
I also wanted to do a handprint with him, but it just wasn't happening this morning. He's usually super eager to get into my ink pads, but I guess the Terrible Twos were rearing their ugly head.
Hubby will be away on his mission trip on Fathers Day, so I'm packing this card in his luggage for him to open Sunday. I hope it makes him feel loved even when away from us on dads' day.
I'm entering this card into the following challenges:
I did some early morning crafting while my toddler son was preoccupied with his newest DVD obsession, Leap Frog's Letter Factory. It's educational -- teaches phonics to pre-readers -- and he loves it, so I don't feel too, too guilty letting him watch it during breakfast.
I made another card requested by my cousin; this one is for a girly-girl who likes zebra print and the color pink. Wouldn't you know, I didn't have a single piece of zebra print in my paper collection...?! I made a quick trip to Michaels last night to remedy that situation and also found some sentiment stamps on clearance. I love bargains!
Here's the girly-girl card -- I'm really diggin' it!
Card Details:
Card Base - DCWV Brights Collection (A2)
Papers - patterns by The Paper Studio; solids and cardstocks from scraps
Cricut Cuts - purse and hearts from Create a Critter, page 36 (accessory and phrase); scalloped border from Elegant Edges, page 30 (border)
Cuttlebug Embossing - D'vine Swirls on purse
Other - sentiment stamp by Hampton Ink
The only purse cuts I could find in my collection were from Create a Critter. Both were pretty basic, so I added the flap to the front of this purse to jazz it up. It's simply the cutout portion between the purse body and handle. Pretty cute, huh?
I must admit, the whole time I was making this card, I was salivating over the purses from Kate's ABCs. I bought it for my mom a while back when it was on sale at Joanns for $19.99, and it's even sitting on my craft table! But I had willpower and didn't open it -- even though she said I could if I absolutely had to. I might be adding that cart to my wish list.
My blog may be quiet, but my Cricut hasn't been! It's been frantically chirping with Fathers Day and birthday cards. By this weekend -- hopefully -- I should be able to share a few "shh-shh" projects with you.
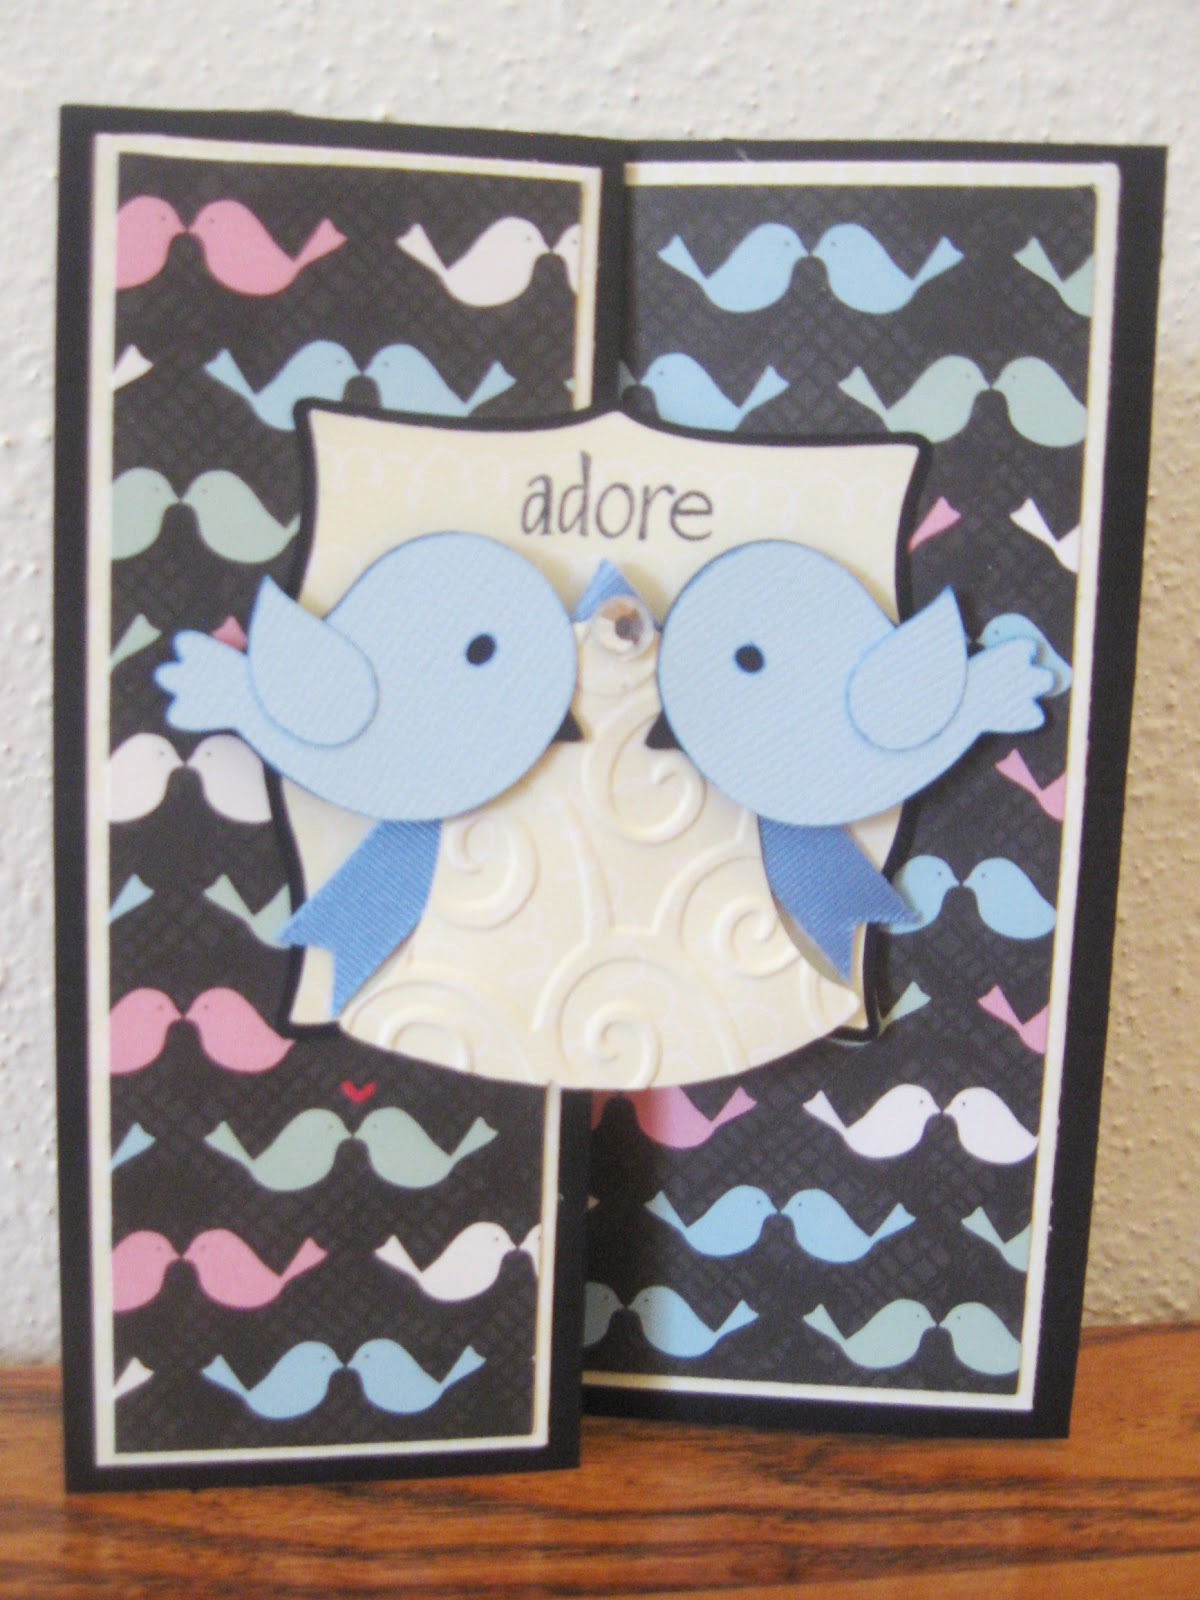
In the meantime, I can post a wedding/anniversary card I made this morning. I've been dying to use this Heidi Grace patterned bird paper, and a card for two nature lovers was a good reason. It's also two firsts for me -- my first Z-fold card and my first time to stamp a sentiment on the front! Here's the entire card stretched:
And folded to view just the front:
Card Details:
Card Base - black cardstock (A6)
Papers - patterned and cream cardstock by Heidi Grace; blue textured cardstock by The Paper Studio
Cricut Cuts - scalloped background from Elegant Edges, page 51 (<btfly2_s>/Shadow); bird from Create a Critter, page 45, legs snipped and one image flipped; bell from Stretch Your Imagination, page 72 (Blackout), handle and heart snipped.
Cuttlebug Embossing - D'vine Swirls on bell
Other - ribbon by American Crafts; "adore" sentiment by The Paper Studio; gem from Michaels dollar bin; inking around edges of bird with sky blue Le Plume II marker